Wanna learn to make stuff like THIS in Photoshop?
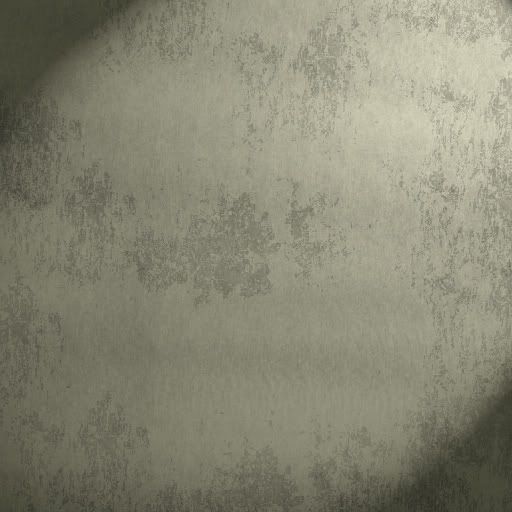
Then read down!

Alright, First you'll need Photoshop, CS2 and Lower should be able to do this.
You'll also need this Brush Set :

Now i'm sure you're like "WTH DO I DO WITH THIS!

!"
Firstly, Get your Marque Tool (top left) then select the right Splotch, now go to
Edit -> Define Brush Preset
Do this with the other Brush and you should have them loaded into your current brush set.
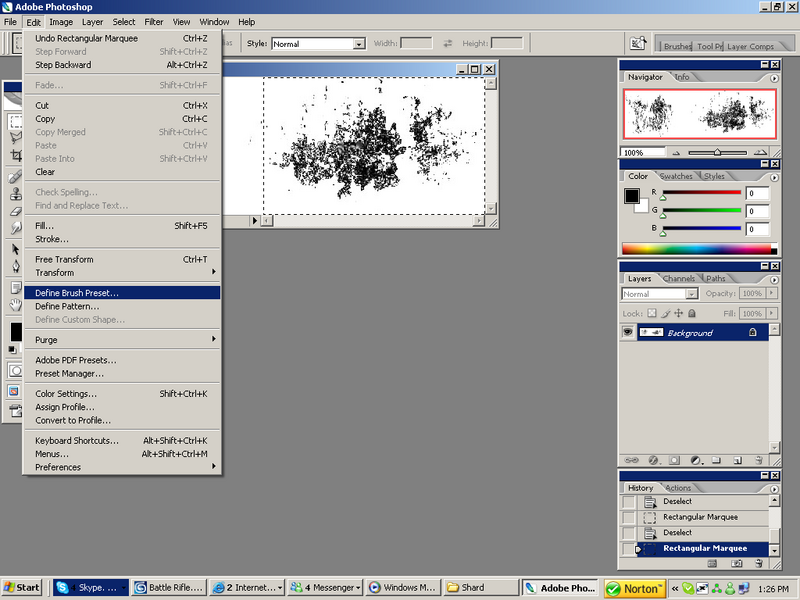
^ Like Above
Now then! Make a NEW Img with these Settings : 512 X 512 Pixels
Select a Gray Color via the Foreground Box (If you look to the left and see a Black and White box, that's it)
I used this color for the Gray : 132 132 132 RGB
Now then, go to EDIT - > Fill, Click the Dropdown and tell it to use your Foreground.
Like So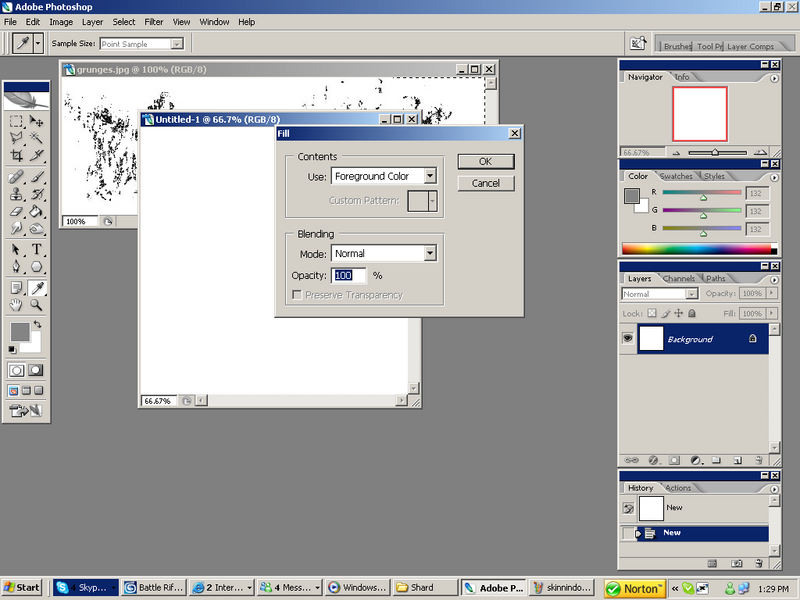
NOW THEN! Press B, it will select your brushes, click the brush (Top Left, you should easily see it) Scroll to the bottom and select one of those Brushes i gave you
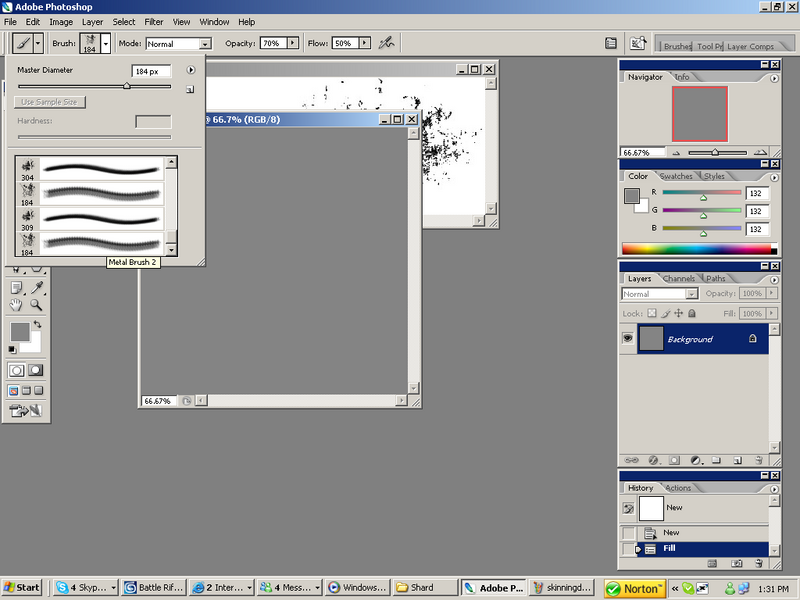
Now that you've done this, Go to
Layer - > New -> Layer,
Now then...This part takes some imagination.
Brush around the Edges so you get a desired effect.
Like so! :
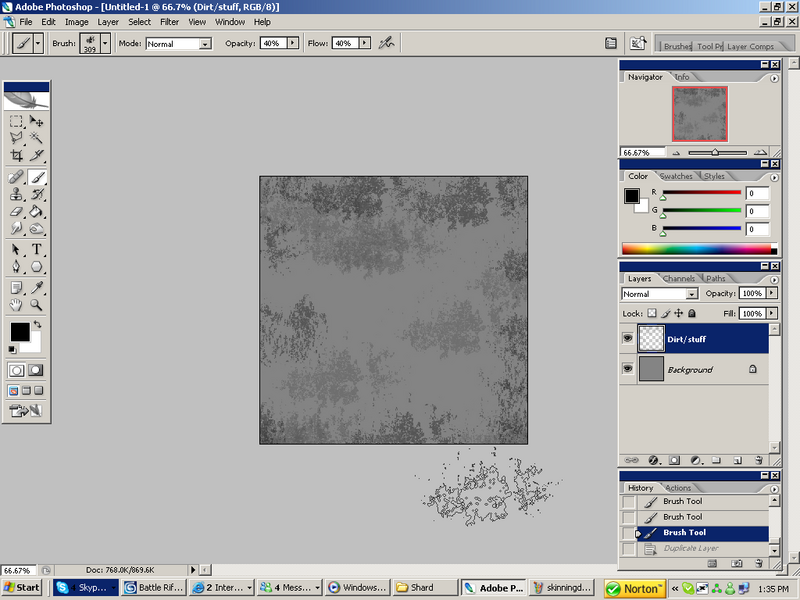
After you have SOMETHING like this (It doesn't have to look the same"
(If you want a varied look, Try changing your brushes Opacity and Flow to 50/70 or 40/40 OR 70/80)
Now then! Duplicate that layer and select the Transform tool :
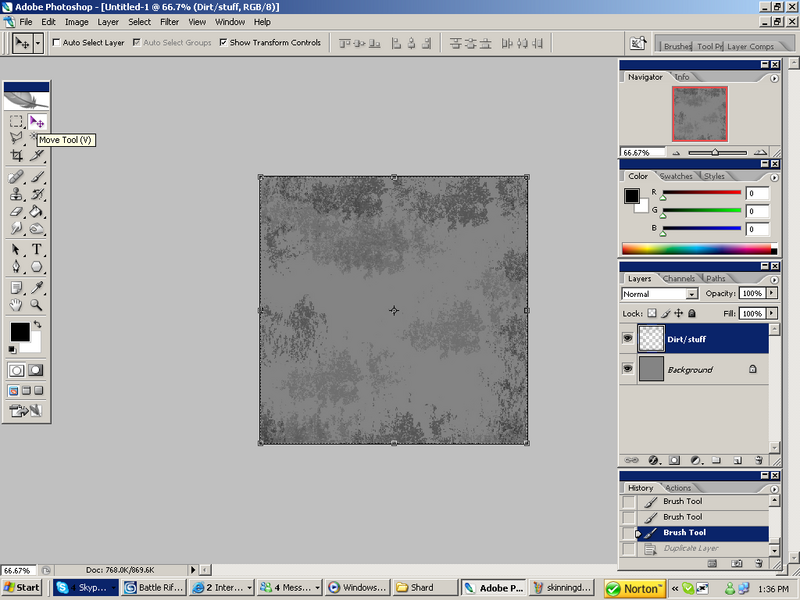
Click : Show Transform Tools if it isn't on already.
Now! when they appear move your mouse to the Bottom Right (Diaganal, like this sign \) and hold down Shift and click, Rotate it till its rotated to the Left, Duplicate that and then rotate it till its rotated oppisite (Upside down from the original layer)
Set the duplicated Layers to Layer Style : Overlay.
Then set the 3rd Duplication to 50 Opacity
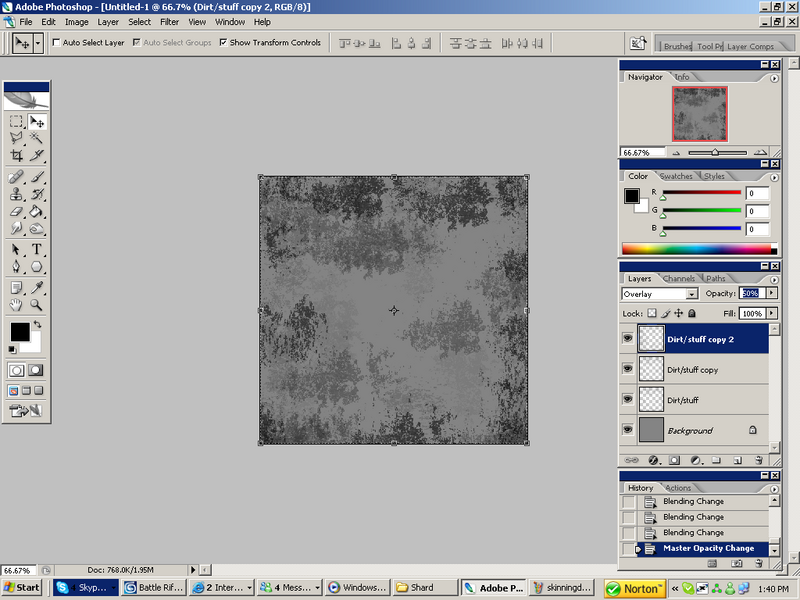
Now then! Perfect!
Lastly, Brush up a bit on the FIRST Layer, Make sure your Brush Opacity and Flow is around 30 or 40
Finally, Press CTRL + E till it's all one layer.
Vuala! One layer meaning it's easy to edit, If you made a mistake delete the History Actions in your Bottom Right
Finally, to make it more convincing!
Go to Filter -> Render -> Lighting Effects
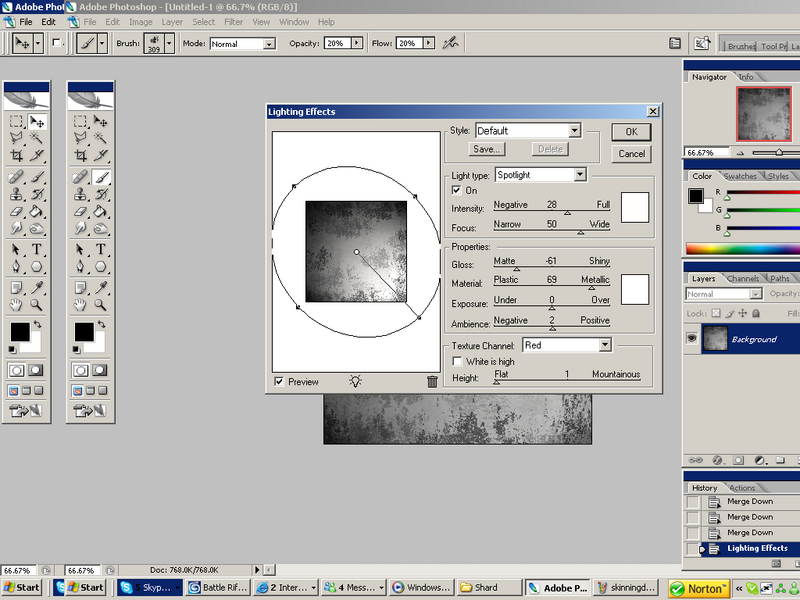
Use those settings
Alright, It's good but it STILL needs a bit more zing to be used for something in Star Wars.
Select your Dodge Tool :
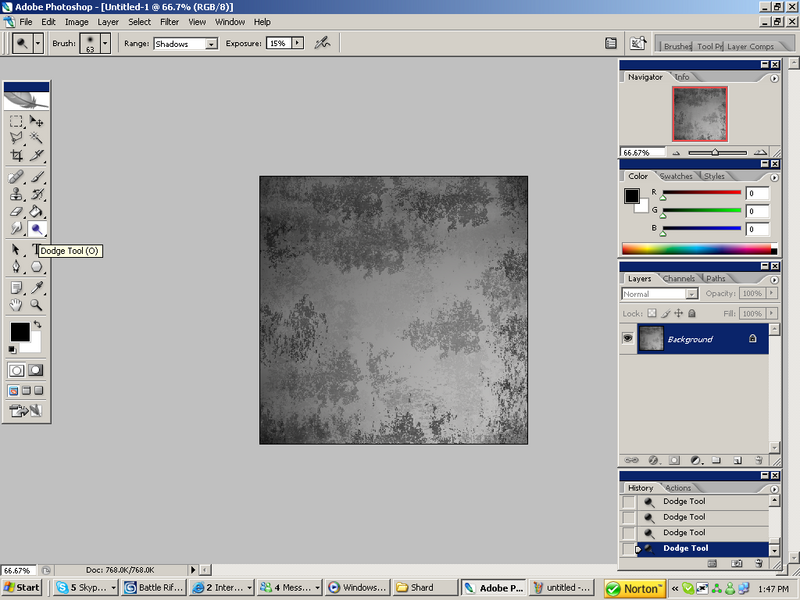
And lighten up some of the Parts that are a bit odd looking or are just TOO dark.
Select your Burn Tool and use the Brushes i gave you and kind of add a bit more Dirtiness to it, Make sure your hardness is at 0.
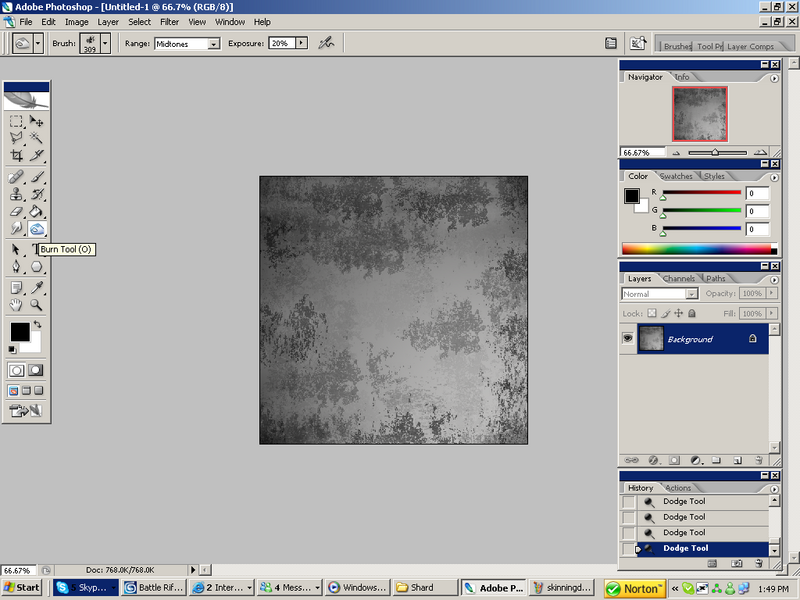
Then finally go to Image - > adjustments -> brightness Contrast
Use these settings : -30 Contrast + 5 Brightness
(you may have to fiddle around to get the right effect)
There you have it!
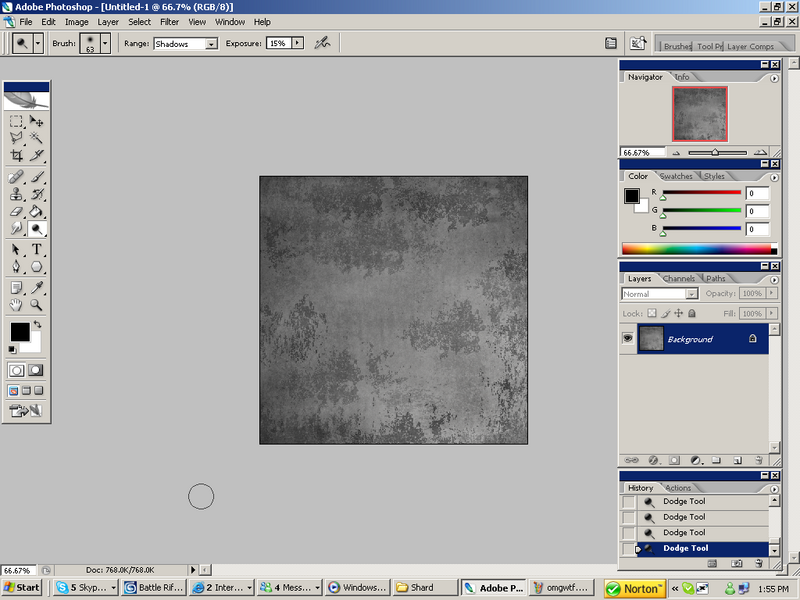
If you want the Lighting Effect for the Example, Go to Filters - > render -> Render Lighting and mess with one of the Presets.
Thanks for reading! if you have any questions please be sure to post them.
Wanna read more Tutorials like this? Go to : http://z11.invisionfree.com/OMEGA_Modding_...dex.php?act=idxCredits to Screaming Cricket for the Brushes